• Skip to secondary menu
  • Skip to main content
  • Skip to primary sidebar
  • Skip to footer

One Moms World Mom Blog - Jen Houck

  • Home
  • About Jen
  • Family Travel
  • Mom Reviews
  • Food Allergies
  • Eosinophilic Esophagitis
  • Contact Us
  • Media Kit

DIY

Thank You Treat for Teachers and Volunteers

My oldest daughter M, is in the midst of end-of-grade testing. I wish so hard that we could actually do away with this testing. It is evil and I don’t think the kids should have to be judged on one test for the school year. I am helping proctor at the school. To be honest, it is very boring but it is the least I can do with what the kids have to go through with the testing.

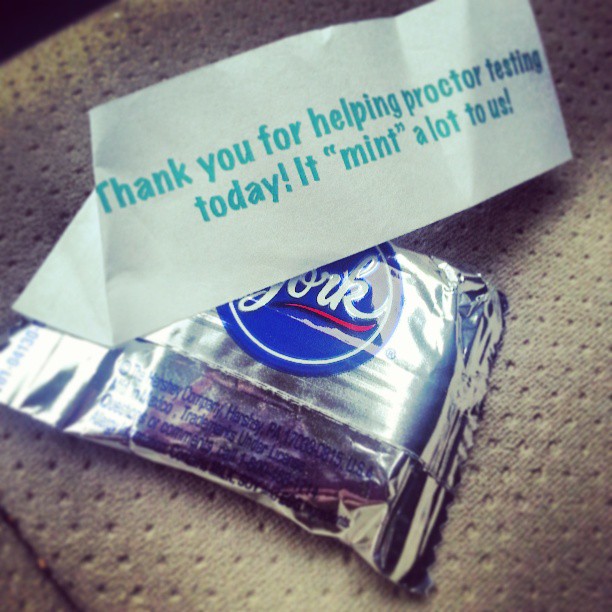
This cute little treat was given to all of us that volunteered.
thank you treat

The little note attached can be changed to your own wording such as “Thank you for being my teacher. It “mint” a lot to me!”


Easy and Delicious Teacher and Volunteer Appreciation Gift

It is hard to believe that the end of the school year is approaching. I, for one, am very eager for the girls to be home and us begin our summer vacation together. Teachers and volunteers work so hard for our kids. We can never repay them for what they do four our kids’ lives but we can give them a token of appreciation.

This gift is simple, easy and delicious. Perfect for summer vacation too!

teacherappreciation

Materials:

Plastic Bag
Ribbon
Printed or Written Paper: We need s’more ___________ like you. (Fill-in-the-blank with the appropriate word)
Graham Crackers
Mini Hershey’s Bars
Marshmallows

I was given this treat at a recent volunteer appreciation breakfast. They were a huge hit with everyone!

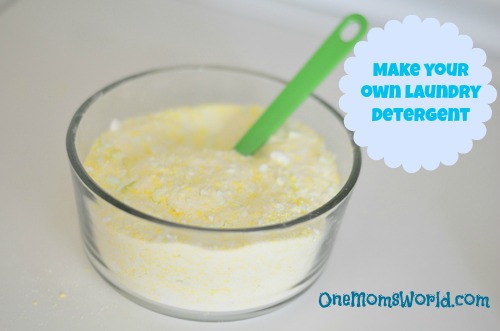
Make your own laundry detergent {Easy}

homemadelaundrydetergent

As you know, we are trying to cut costs out of our budget. My husband is actually the one that came up with the idea of us making our own laundry detergent. He made the trip to the store and bought the ingredients and we are loving how easy it is, not to mention how cheap!

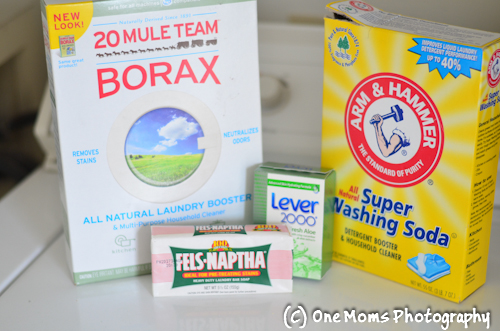
You need the following ingredients:

homemade laundry detergent

– 1 cup of Borax
– 1 cup of Arm & Hammer Super Washing Soda
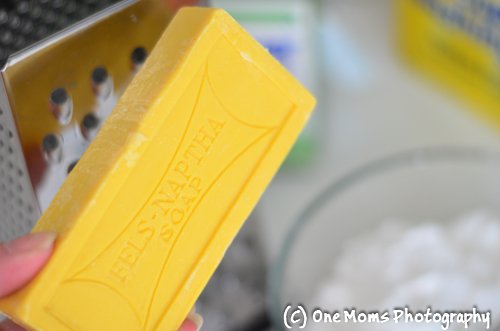
– 1/2 bar of Fels-Naptha
-1/2 bar of soap (we use Lever 2000)

You do not have to use a 1/2 bar of soap. You can use the entire bar of Fels-Naptha but I just like using the soap to give it a  more fresher scent.

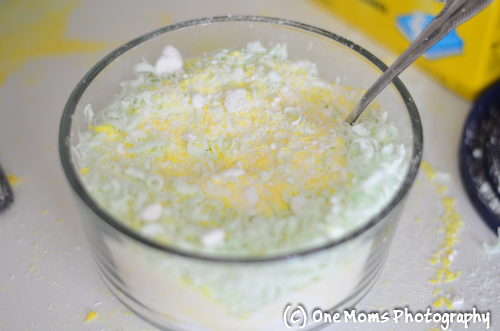
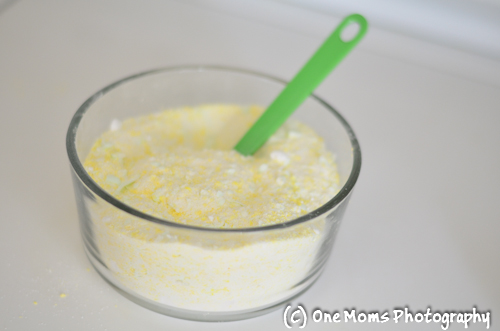
Pour in 1 cup of Borax and 1 cup of Arm & Hammer Super Washing Soda into a bowl. Then use a grater to shred the bars of soap.

homemade laundry detergent

homemade laundry detergent

Stir ingredients really good until they are mixed well.

homemade laundry detergent

You are finished. It really is that easy. Use one tablespoon per laundry load. You can use two if you have a very soiled laundry. Your decision.

DIY Ruffled Scarf – Great homemade Christmas gift!

This season, my entire family is getting back to what Christmas was really about. It is not going to be all about the hottest Christmas items this year, instead we are concentrating more on Jesus, family and homemade gifts. I am not a fan of all the commercialism that Christmas has began, and it warms my heart to give and receive homemade gifts. Those are really the best kind right?

I am a huge scarf fan and was so excited when my classmate on campus showed me her DIY ruffled scarf. She had sent me a message and I asked her if she would like to guest post here to share with all of YOU? She very excitedly agreed. Please welcome Cassandra Hartley from Flying by the Seat of my Pants.

Thank you Jen, I am so glad to be here.

What’s a girl to do with an old t-shirt? Well, if you’re like me, donate it to Goodwill. But some brilliant woman somewhere along the line decided to get crafty with them and turn them into scarves. I was (as usual) wasting time browsing on Pinterest one evening when I ran across this delightful idea, and promptly pinned it to my Crafty Stuff board.

Now anyone that knows me, knows that I don’t generally gravitate towards ruffly things. But the caption caught my eye- “3-4 no sew scarves made out of old t-shirts”. I had to know more. The link on the Pin led to a blog linked to an instructional video on just how to accomplish this. I watched the video that night, and made a mental note to look through the clearance rack next time I was at the store.

Sure enough, Sunday afternoon found me at the Wal-Mart, and by some fluke I actually remembered to look through the clearance rack to see if they had any cheapo knit tees. Sure enough, I found two 2XL chocolate brown tank tops for $3 each. Done! I used one top last night to test the method, and sure enough it worked, so tonight I documented the steps to do it as I could not find another blog listing the steps out for people like me who learn via reading, not by watching a movie.

What You’ll Need:
A Big T-Shirt or Tank Top (I went for a 2XL)
Scissors
Fabric Glue
A Circle about 8-9″ diameter. (I cut the flat bottom out of a 10.25″ styrofoam plate.)

Cut off the bottom seams of the shirt. Cut off the top of the shirt just under the armpit seams.

This will leave you with a stretchy tube. If you want, you can just stretch and pull on it like a saltwater taffy machine and call it an infinity scarf. I’m not a fan of that look so we’re going to keep going.

Cut the side seams completely out of the tube. You should now have two panels of fabric.

** This is a good time for me to mention how essential it is to make sure you’re working with jersey knit fabric. Why? It’s super soft, won’t wrinkle, is stretchy, and best of all won’t fray! That’s why the original pattern calls for use of an old T-Shirt. I go on closet cleaning sprees every 2-3 months, donating the castoffs to Goodwill, so I didn’t have any broken in shirts to use, but the new bought items worked perfectly.

Set aside one of the panels. Take your circle guide and figure out where to cut to get 4 or 5 portions out of each panel. I was able to get four out of each panel of my tank top. If you notice, those are not circles just yet- I didn’t have a light colored pencil to trace around the circle, so I cut out the square around it.

Make certain that you end up with a long rectangle from one side of one of the panels. Set it aside- you’ll need it later.

Next, round off the corners of the squares. (See why not tracing the circle pattern earlier was not a big deal?) You should end up with one pile of scrap cloth and one pile of 8-10 circles. Don’t sweat it if the circles are not uniform and are a little lopsided. It won’t matter.

Now comes the fun part! I was distracted talking to people on Facebook during this part, so I forgot to get a photo, but we’re going to take the scissors and cut each circle into a spiral.

When you hold up one end of your new cloth strip, it should look something like this. See how it naturally wants to curl around itself? Help it along by stretching. You heard me. Hold one end and run your other hand down the strip while stretching it. It’ll curl even more- and it’s kind of fun to do!

Repeat that for the other circles. You should now have a nice pile of curly cloth strips. If you cut your spirals like I do, you’ll have one pointy end and one blunt, rounded end. This is perfect.

Take two strips and glue the pointy ends together, one right on top of the other with the long curly ends going in different directions. Essentially, double the length of the curlycue. Repeat for the other pairs. You’ll probably have to hold together the glued part for a few seconds to set up the bond, and be careful when moving the newly glued pieces around until the glue sets up.

Not quite the Golden Arches…..but you get the point. Because I had 8 circles, I ended up with 4 pairs of strips.

Next, stack the glued parts on top of each other, bing bang boom done. Remember that rectangular piece I had you hold out earlier? Now is its time to shine! Round off its corners into a big oval and put a spiral slice into it as well. It won’t be quite as curly as the others, but that’s OK too.

Take this new short strip you just made and tie it in a Larks Head knot around the four glued pieces. (If you need a reminder how to tie a Larks Head knot, click here.) Gently tug the knot tight.

DONE!

Scarves really don’t get easier, cuter, or more eco-friendly, folks! I rocked mine today with an aqua shirt and a denim jacket as needed. With my baked marble earrings and nerdy glasses, it was the perfect fall look!

Supplies Needed (and my cost to buy them)
1 old T-Shirt or a cheap tank top ($3 at Walmart but this could well be in your closet!)
Aleene’s Fabric Fusion glue ($5 at Walmart)
Scissors (If you don’t have these on hand already there is a problem)
Paper plate (pennies)

Awesome homemade gift idea for a special friend and/or family member!

Related Posts with Thumbnails
« Previous Page

Primary Sidebar

Hello! I'm Jen and my family is my world. My hope is One Moms World will give you ideas for family travel and/or give you great consumer product suggestions that will be useful for your family. Remember to spread joy today!

Follow Us!

Follow Us on FacebookFollow Us on InstagramFollow Us on TwitterFollow Us on PinterestFollow Us on YouTube

Search

Receive our updates in your inbox!

Enter your email address:

Delivered by FeedBurner

Footer